Sunday, August 25, 2013

My Classroom Projects


Well, these aren't pictures of our home, but my classroom is my home away from home.  So, here are some projects I've done to get my room ready for the year.  Still so much more to do!
Rock Star classroom
This is a sign on my front door.  I LOVE the acronym I found.

Rock star classroom
Welcome sign

attendance lunch magnet cookie sheet
My attendance/lunch chart.  I'll have to get a better photo of the magnets I made.  They are super colorful and cute!

Teacher toolbox
My "Teacher Toolbox"

Rock star zebra decoupage filing cabinet
A donated filing cabinet needed some mod podge love!  
Classroom library
My classroom library.  I still need to get more and more books!
Book basket zebra labels
A close up of my book basket labels

Rock star themed classroom

Classroom library check out system
My library check out/return area.  Students will write a check/out return slip, put it in their books, and put the books in the proper basket.  My class librarian will then check them out or return them on the computer using "Classroom Organizer".  What a great tool!  I even have the Classroom Organizer app on my phone so I can scan in new books.  You can also use a phone or regular scanner and computer to check books in and out.

Thursday, June 13, 2013

Ugly light box makeover

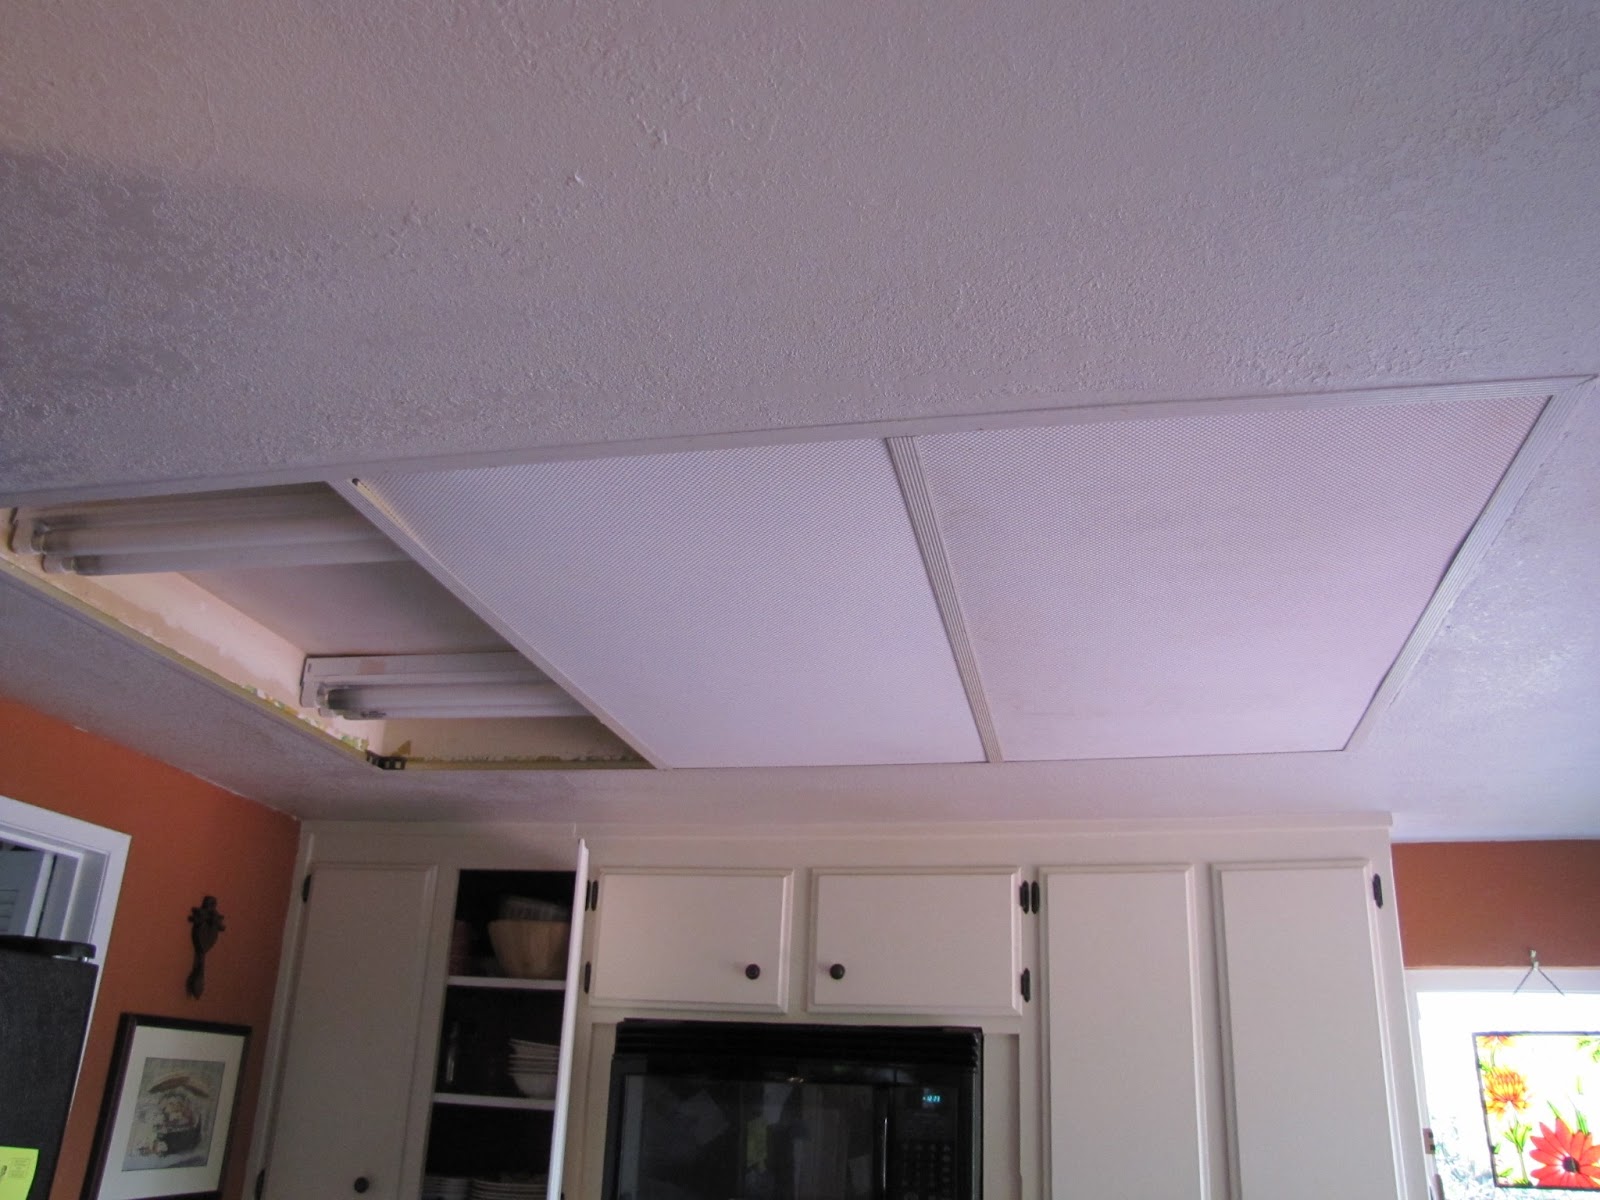
Well, if your house was built in the 80's, you may be the proud owner of a big ol' ugly light box.  Our house was actually built in 1971, so I'm wondering if this was put in as a remodel.  Gasp!  Ours was a recessed beauty with old, grimy plastic insets.  Of course I loved that cold, fluorescent lighting...NOT!  Here's a before:

If you look closely, you might actually see some old wall paper (or ceiling paper) that looks like it jumped right out of the kitchen on The Brady Bunch.  

Now, I am a huge fan of covered things up!  It's way easier and often more cost effective than trying to patch or do a total redo.  Our bathroom had more wallpaper (ceiling paper) and the ceiling was sagging.  So, instead of taking off the paper and having to repair the ceiling, we covered it up with some awesome bead board.  SO much nicer than just plain old ceiling anyways.

Oops!  I digress.....So, covering things up.  I knew that after removing the lights from the ceiling, there would be holes, there were, and then the ceiling wasn't textured and there was wallpaper, and it was just a mess.  

So, covering up it is!  I had the idea to match the faux tin tiles we used as a backsplash behind the stove, but at like $30/panel, they were too pricey.
 So, I found matching real tin ceiling tiles online for a good price.  The kicker was that they were raw metal.  I thought about trying to reproduce the copper-like finish on the back splash tiles, but it didn't look good at all.  Finally, inspiration hit that I should just paint them the same color as the rest of the ceiling.  The ceiling is low anyhow, so this was best.  I did a copper decorative finish around the sides, jury is still out on if I love this, added some wood trim, and put in a simple light.  I would have loved a nice hanging pendant light or chandelier, but as you can see, the is not over an island or anything.


Here's a  pic. in progress:

Painted tiles and some decorative painting.


And here are some today.  It was hard getting good pics. in a not so big kitchen.
kitchen light box makeover redo

kitchen light box makeover redo

kitchen light box makeover redo

kitchen light box makeover redo
MUCH BETTER!!!

So, total price of this redo was about $130.  I call that pretty darn cheap for getting rid of that big ol' ugly light box.  


Saturday, May 4, 2013

Another New to Us Redo! Craigslist Bookcase/Desk Free Find


Anyone who knows me and my house knows that I have furnished most of my house from hand me downs, thrift stores, auctions, ebay, and of course......CRAIGSLIST!  Man!  What did I do before Craigslist was in my life?  Well, I have bought many inexpensive items off Craigslist.  Some of my favorite thing on Craigslist are from the free list.  You can find some great things on there.  The first thing we got that was free was a simple oak bookcase.  It was in that 90's yellow oak, so I restained it in a darker stain to match our other dark oak furniture.  It does the job.
Now on to my 2nd free item from Craigslist!  As we were working on the floors in the office, I was considering all the stuff we had to put back in the office.  I have so many cute craft things for the kids,but the kids never seemed to access them in the office.  In addition, the small little plastic storage thing we used for crayons, stickers, etc....was not big enough.  I decided that we should get some kind of cabinet for the dining room.  Maybe a computer armoire that can contain all the mess.  I saw a few good things, but being currently unemployed, free was the price for me.  I found this bookcase-desk for FREE!!!!  I knew I could make it look way better.  I think I did!  What do you think?


BEFORE- Pretty isn't it?  Outdated finish, brass hardware, one broken handle.

Another before picture

Drumroll please!


After! Much better right? I painted the whole thing a light antique white, sprayed the existing hardware a hammered black finish, replaced the broken handle with a $3 handle from OSH. I did buy some spray paint, but ended up finishing the rest of the painting, hardware included, with paint we had in the garage.


After 2-A surprise springy green on the inside. It's definitely a bit bold. I like it, but might still tweak it a bit when my fabric comes in.  It even came with working lights in the top and bottom!  Score!


My daughter is busy working on her next art project.  We love our new art cabinet.  Now, get out there and find something free to makeover!


Cute little side table redo

My in laws were throwing out this cute little table.  I of course immediataley started thinking what I could do with it.  My daughter needed a small beside tabe and this was just the right size.  As given, it was brown, crackled and peeling.  So I sanded it,  sprayed it off white, and sanded again to give a distressed look. It looked super cute but I thought it couls be cuter.  I went on down to the art supply store around the corner where they have fabulous papers.  I found a cute girly floral paper and decoupaged it to the top.  Viola!  Much cuter little table.  Wish I had taken a before picture.  I really do have to get better at doing that!

Sunday, April 28, 2013

Here we go!

Well, I decided to try my hand at blogging again.  Many years ago, ahem it was really only about 5 + years ago, before Facebook and Twitter were in every home, I had a blog to post pictures and updates about my family.  I live in California and the rest of my family is in Lousiana and Michigan.  Once I entered into the world of Facebook, it seemed to be an easier, faster way to share pictures of my own family with my far away friends and family.  So, here I am many years later, remember it's only been 5 years, trying my hand at another blog.

Why am I doing this?  I am currently, soon to be unemployed again (more on that later), a full time teacher, Spanish student, wife and mom of two.  I don't have time for this.  Well, I've also jumped into the world of Pinterest.  Still not sure how Pinterest is going to make my life easier or at least more interesting.  I did think I'd like to share my own photos of home and craft projects and my parties.  So, looks like I need a blog or something to link back to.  I've always liked sharing my ideas, but haven't really been able to find a willing audience from my FB friends.  So here's hoping someone other than my mom reads this blog and find it interesting, helpful, inspiring, or some other adjective.